
To clean a roasting pan after a turkey dinner, first identify its cooking surface. A stainless steel roaster with burnt drippings can tolerate a different treatment from a coated rack or an aluminum tray. Scrubbing everything with the same strong pad risks turning removable residue into permanent damage.
Start with a cooled pan, dish soap, warm water, and a soft sponge. Escalate only when you know what remains and what your manufacturer permits. The seven checks below help you clean a roasting pan without buying a replacement or spending the evening chasing harmless discoloration.
As an Amazon Associate I earn from qualifying purchases.
Table of Contents
1. Identify the surface before you clean a roasting pan
Check the model number on the underside or purchase receipt. A shiny exterior does not prove that the interior is uncoated stainless steel. Likewise, a stainless pan can arrive with a nonstick rack that needs gentler care.
Use the manufacturer’s instructions for the precise model, including the rack. If the booklet is missing, look up the item rather than borrowing directions from another product in the same brand.
| Cooking surface | Sensible starting treatment | Escalate only when permitted | Avoid as a default |
|---|---|---|---|
| Uncoated stainless steel | Warm soapy water and a soft sponge | Cookware-approved stainless cleanser | Oven cleaner, steel wool, chlorine bleach |
| Nonstick or ceramic-coated metal | Dish soap and a soft sponge | Maker-approved stain treatment | Abrasive powders and aggressive scouring |
| Bare aluminum | Mild detergent and gentle washing | Model-specific cleaning advice | Strong alkaline cleaners and prolonged acid exposure |
| Enameled cast iron | Cool, wash gently, inspect enamel | Manufacturer-approved residue treatment | Metal scraping and abrupt temperature changes |
| Seasoned cast iron or carbon steel | Wash, remove residue, dry promptly | Seasoning repair if required | Long soaking or treating seasoning as dirt |
When you clean a roasting pan with an unknown finish, stay with the mild starting treatment until you can identify it. A stubborn patch is less urgent than preserving a coating you cannot replace.
The site’s roasting pan alternatives guide helps identify other vessels you may have used. A casserole dish borrowed for turkey needs its own care instructions, even when the meal was identical.
Before you clean a roasting pan with a separate rack
Lift out the rack and inspect its crossbars, feet, and coating. Food often gathers where wires meet. When you clean a roasting pan, treating those joints separately is more effective than pressing a sponge across the entire assembled pan.
2. Cool the pan and remove loose fat first
Set the roaster on a stable, heat-resistant surface and let it cool before washing. Do not carry a heavy pan full of hot water across the kitchen. Handles may remain hot after the cooking surface looks harmless.
All-Clad’s stainless steel care guidance recommends cooling before cleaning, then washing with gentle dish soap and drying thoroughly. Its approach is a useful starting point for compatible stainless cookware.
Remove loose food and collect fat in a suitable container for disposal under local rules. Avoid washing a layer of turkey fat into the sink. Wipe away the remaining grease so detergent can reach the cooked-on residue beneath it.
If you already deglazed the pan for gravy, this first wash should be easier. Deglazing is a cooking step; once cleaning products enter the pan, none of the liquid belongs in a sauce.
Practical example: a brown layer under the turkey may soften quickly, while dry splashes above the liquid line remain fixed. Treat those as two cleaning jobs instead of assuming the entire roaster needs a stronger chemical.
3. Soften drippings before increasing scrubbing pressure
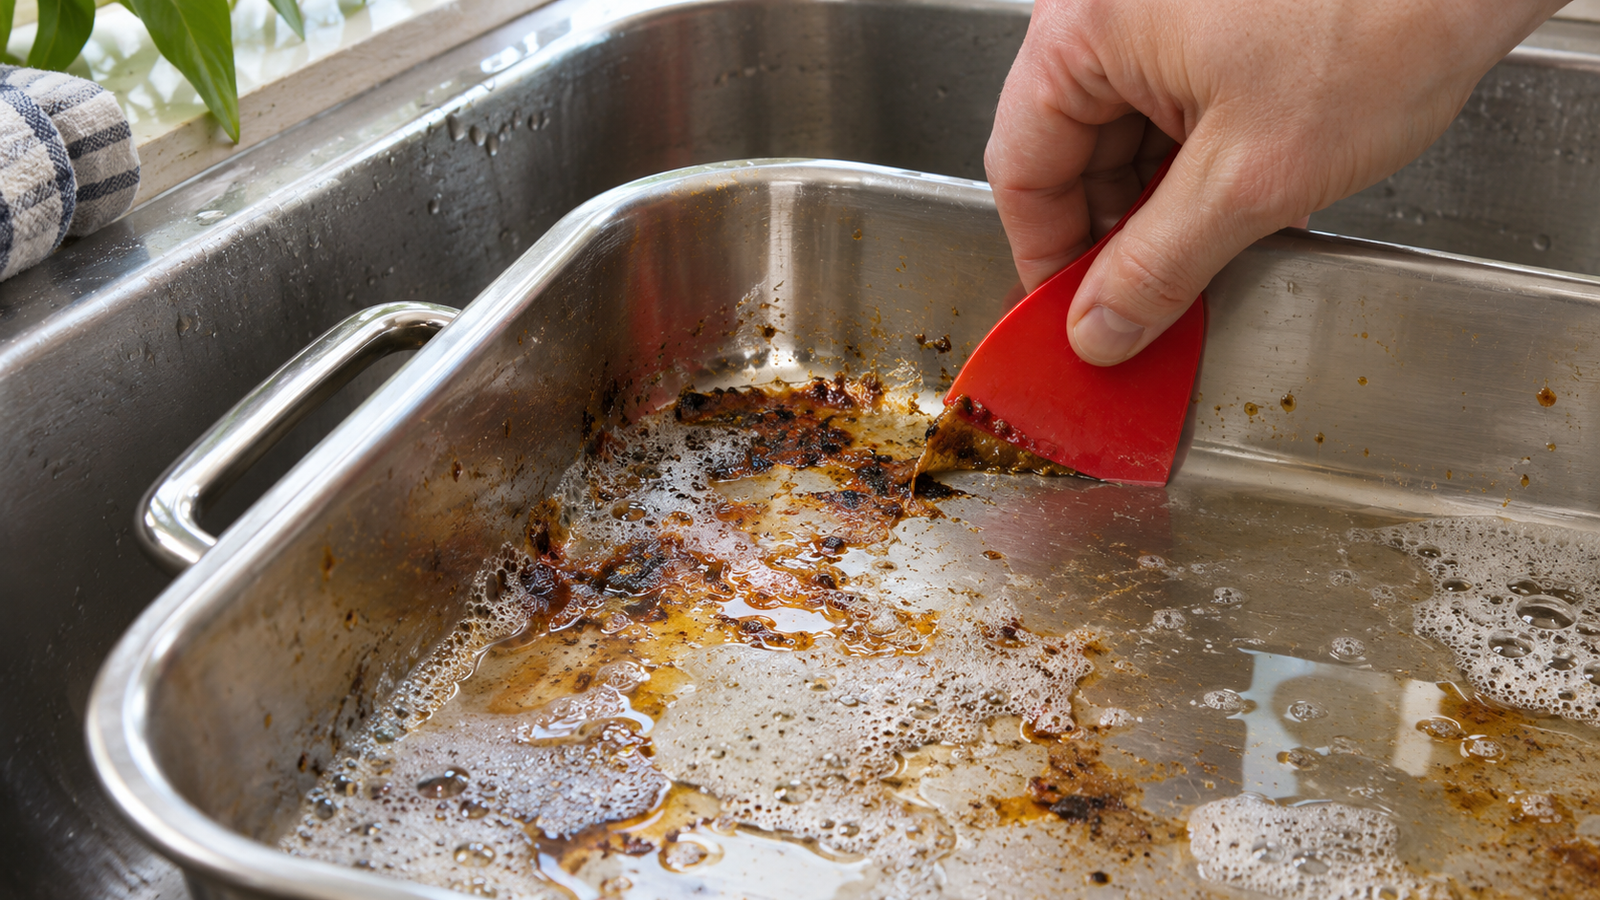
For a pan whose instructions allow soaking, add warm water and dish soap to cover the residue. Leave it supported in the sink and return when the food begins to soften. The exact wait depends on the thickness of the crust; there is no reliable universal ten-minute promise.
Use a soft sponge or an approved scraper to test one small area. If residue lifts, continue gently. If it barely moves, refresh the water and reassess the material before pushing harder.
To clean a roasting pan that overhangs your sink, work on one end at a time with the pan securely supported. Avoid balancing a water-filled roaster across a narrow basin or leaning your weight on a handle.
A Lodge Pan Scrapers two-pack, model SCRAPERPK, is a useful option for loosening softened food around rounded corners. Confirm tool compatibility with your pan and use it only after cooling; a scraper is not a substitute for softening a hard crust.
Find Lodge SCRAPERPK pan scrapers on Amazon.
When soaking is the wrong way to clean a roasting pan
Do not leave seasoned iron or carbon steel submerged while you wash everything else. Lodge’s cast iron care instructions advise against soaking and call for thorough drying followed by a thin layer of oil.
If a seasoned surface is involved, clean it promptly using its own care routine. A dark, smooth seasoned layer should not be stripped simply because a neighboring stainless pan is bright silver.
4. Treat stainless steel residue according to what remains
Before you clean a roasting pan again, rinse and inspect the dry surface under good light. A raised black crust, a sticky brown film, and a smooth rainbow patch can look similar in a dim kitchen but need different attention.
For compatible uncoated stainless steel, All-Clad suggests a paste of baking soda and water on burnt areas for 5–10 minutes, followed by a non-abrasive sponge. Spread it on the residue rather than on an entire mixed-material assembly. Rinse and wash afterward; check your specific pan’s directions before using this on another brand.
For ordinary food still attached to uncoated stainless, return to gentle washing or a cookware-approved cleanser. Follow the pan maker’s restrictions and the cleaner’s label together. Approval for stainless does not automatically cover a nonstick rack, decorative trim, or exposed aluminum edge.
Bar Keepers Friend Cookware Cleanser & Polish is worth considering for compatible stainless surfaces when soap has left persistent residue. It is a targeted next step, rather than something to leave soaking in a pan overnight.
Find Bar Keepers Friend Cookware Cleanser & Polish on Amazon.
The manufacturer’s application instructions specify gentle use on a wet surface and rinsing within one minute. For difficult marks, its paste treatment also has a one-minute maximum. Do not mix it with other cleaning chemicals; use gloves when the label recommends them.
Working in small sections makes that time limit manageable on a large roasting pan. Rinse one area before starting another, then wash and rinse as directed before cooking again.
Watch Hestan Culinary’s stainless cookware care demonstration below. Follow the instructions for your own roaster: the video discusses Hestan cookware and does not establish what is suitable for every coating or rack.
Clean a roasting pan without chasing harmless color
A smooth rainbow tint is different from stuck food. Check whether the pan feels clean after washing rather than repeatedly grinding the colored area with a pad.
Our stainless steel rainbow stains guide explains that specific problem. Addressing appearance separately prevents unnecessary scrubbing when the cooking surface is already clean.
White residue may also need different treatment from grease. Consult the care guide before applying a descaler or acidic cleaner, particularly if the pan has mixed materials or an uncertain finish.
5. Protect coated pans, enamel, and aluminum
To clean a roasting pan with nonstick coating, use a soft sponge and mild detergent first. Stop if the coating itself is peeling or flaking. Washing cannot restore a missing cooking surface.
Calphalon’s bakeware care guidance warns against abrasive pads and cleansers. It also notes that aerosol cooking sprays can build up on nonstick surfaces and impair release. Apply those directions to the listed products, rather than assuming every roaster has identical limits.
A Scotch-Brite Non-Scratch Scrub Sponge offers a gentler washing option than a heavy-duty scouring pad. Check the sponge packaging and your cookware instructions, rinse out trapped particles, and try an inconspicuous area before broad use.
Check Scotch-Brite Non-Scratch Scrub Sponges on Amazon.
For enamel, distinguish food deposits from damage to the glazed surface. If you can see a chip or a crack, pause and ask the manufacturer about continued use. Do not scrape into the damaged area to discover how far it extends.
For bare aluminum, avoid assuming that a stainless cleaner is suitable. Color changes and chemical sensitivity differ between materials. A mild wash is a better interim choice than experimenting with strong cleaners from under the sink.
Why one cleaning recipe cannot clean a roasting pan of every type
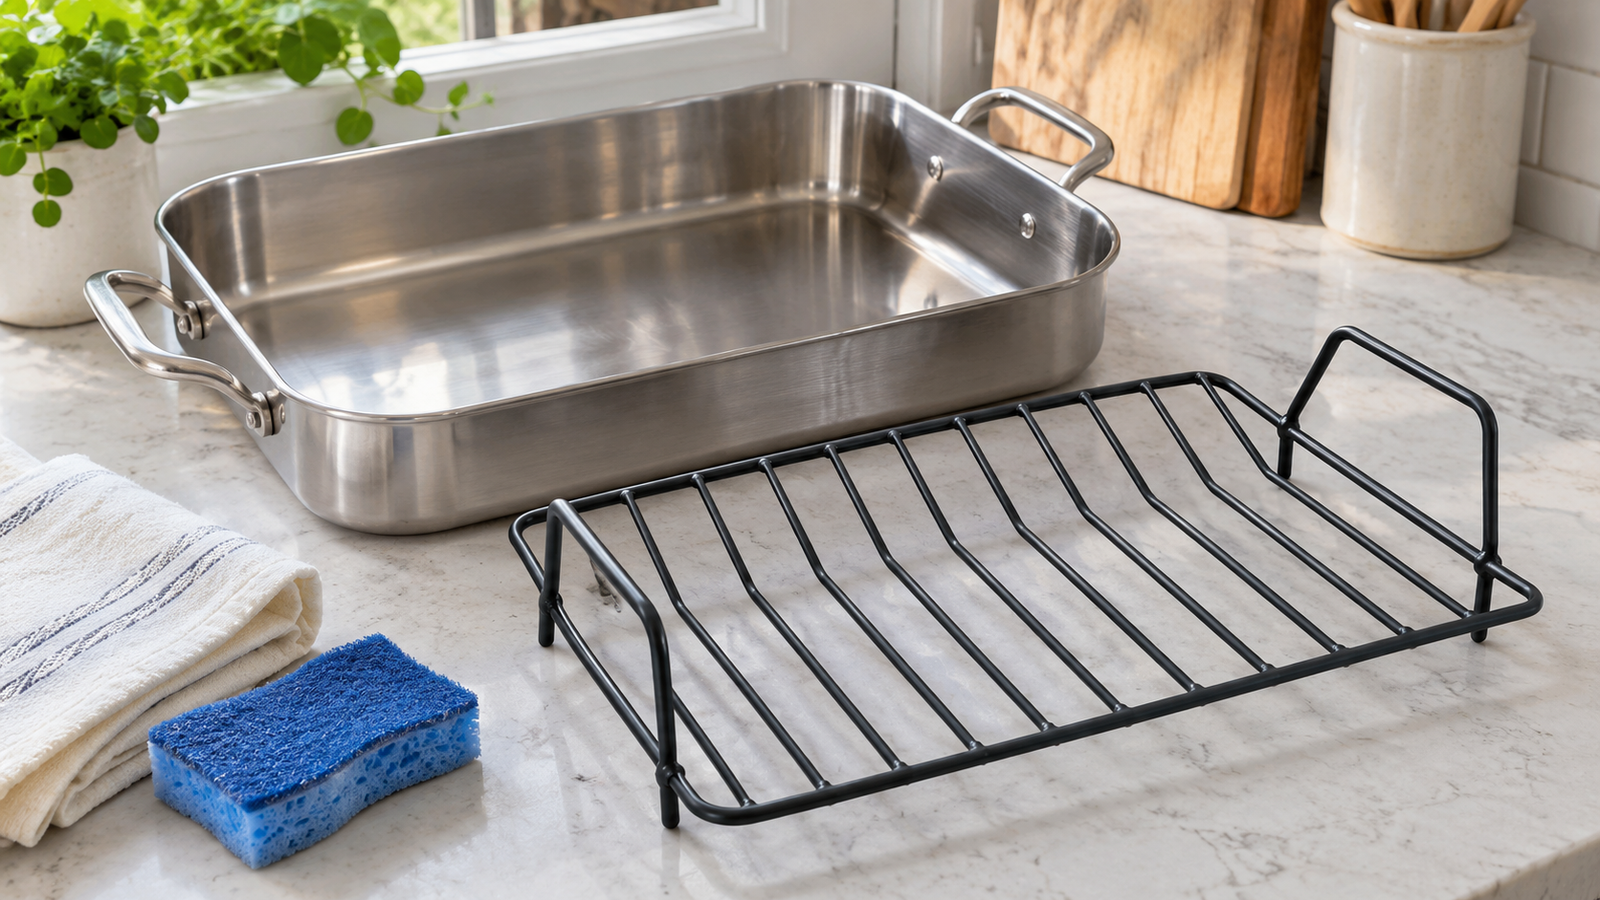
The same roasting temperature can leave similar brown residue on different surfaces. That visual similarity does not make the surfaces interchangeable. The coating, exposed metal, rivets, and rack all affect which method is appropriate.
6. Wash the rack, corners, and exterior separately
Clean a roasting pan methodically: floor first, then corners, walls, handles, and underside. This sequence makes it easier to notice whether you are removing food or merely spreading grease around.
For the rack, work along each wire rather than pushing across several at once. Turn it over to reach the feet. A soft brush approved for the surface can reach joints that a flat sponge misses.
If the rack needs soaking and its instructions permit it, use a container that supports it without bending the wires. Do not force a large rack into a small sink simply to get every corner underwater at once.
When you clean a roasting pan on the exterior, give attention to the underside before the next meal. Residue there can become harder to remove with another heating cycle. Keep cleanser away from surfaces the label excludes, and rinse handles and seams carefully.
Dry the pan and rack separately before reassembling them. A towel placed beneath a nested rack should not become a way of trapping moisture inside a cupboard.
If you plan to use the cleaned roaster on a cooktop, check the base and compatibility again. Our induction roasting pan guide covers the fit and heating questions; a clean pan still needs to match the hob.
Check the result before you clean a roasting pan again
After rinsing, move a clean fingertip gently over the cooled surface. A rough ridge suggests material remains attached; a smooth patch that only looks different is a reason to consult the discoloration guidance. Do not perform this check where you suspect sharp chips or exposed damaged coating.
If you need to clean a roasting pan twice, repeat the mild method only when it is making visible progress. More pressure is a poor response to an unchanged mark whose cause is still uncertain.
7. Make the next roast easier to clean
Clean a roasting pan before yesterday’s residue goes back into the oven. Even a small patch deserves attention when it feels sticky or raised. A cosmetic tint alone is a different decision.
Before the next roast, check the recipe, rack position, and permitted oven temperature. These choices affect how easily you can clean a roasting pan afterward. Keep glazes where the recipe intends them instead of letting sugary drips collect unnoticed in dry corners. Do not add water automatically: liquid changes cooking conditions and should suit the dish.
Consider whether the roaster is much larger than the food. A small joint in a very large pan leaves more exposed floor for drippings to scorch. Our roasting pan alternatives guide helps match the vessel to a smaller meal without another purchase.
Know when to stop trying to clean a roasting pan
Stop escalating when the surface is clean and only a harmless appearance change remains. Stop using the cookware and seek model-specific advice when you find structural damage, loose handles, or a failing food-contact coating.
A pan that rocks on a flat surface needs assessment before stovetop use. Scrubbing will not correct a distorted base. Likewise, an immaculate rack with damaged coating has not become serviceable simply because every crumb is gone.
For an expensive roaster with persistent residue, send the maker a clear photograph, model number, and list of products already used. Those details make the next recommendation more useful than asking whether a generic “roasting tray” can take a stronger cleaner.
Frequently asked questions
What is the easiest way to clean a roasting pan?
For a pan whose maker allows soaking, remove loose fat, let the pan cool, and soften residue with warm soapy water. Wash with a soft sponge and escalate only to a method approved for the exact surface. Treat the rack separately.
Can I clean a roasting pan with baking soda and vinegar?
Check the manufacturer’s directions before using either. Different surfaces need different treatment, and a fizzing mixture does not prove that grease is being removed. Use one approved cleaning method at a time and rinse before changing products.
Can a roasting pan go in the dishwasher?
Only if the instructions for that exact pan permit it. Check the rack separately, since its coating may have different restrictions. When dishwasher compatibility is uncertain, hand washing with mild detergent is the sensible starting point.
How do I clean a roasting pan that will not fit in the sink?
Work on one supported section at a time, using a sponge and modest amounts of water. Avoid balancing a heavy, water-filled pan on the sink edges. If soaking is permitted, use a stable container large enough to support the cookware.
Can I clean a roasting pan with oven cleaner?
Do not assume oven cleaner is cookware-safe. All-Clad’s stainless care instructions specifically prohibit oven cleaners, and coatings or aluminum may have other restrictions. Choose a product approved by both the cookware maker and the cleaner’s label for that surface.
Is a brown roasting pan ruined?
Brown buildup alone does not prove damage. Wash and inspect it to distinguish attached food from discoloration. Peeling coating, chipped enamel, loose handles, or substantial distortion need manufacturer advice; stronger scrubbing cannot repair those faults.
Leave a Reply