
You pull the turkey out, set the roaster on your new cooktop and get a blinking pan symbol. Dinner is ready, the browned bits are still in the tray, and you have one burner left. An induction roasting pan can make that oven-to-stove transfer simple, provided its magnetic base fits the zone you actually use. If your old roaster still does its job in the oven, you can save the drippings with a saucepan you already own.
Decide which job you need the pan to do before you shop. The best shape for a whole bird can be awkward over a single induction coil. And the pan you can whisk in comfortably might be too small for the roast you serve every December. The checks below cover both, including a rehearsal you can do before guests arrive.
As an Amazon Associate I earn from qualifying purchases.
Table of Contents
1. Check the induction roasting pan by model number
Start with the exact item number on the manufacturer’s page. A retailer’s headline might say “stainless steel” or “stovetop safe,” but the specification you want is explicit compatibility with induction cooktops. Within a single brand, roasters can have different bases. This matters when a familiar brand offers an induction roasting pan alongside a similar-looking oven-only model. All-Clad’s own roaster guide distinguishes induction-capable models from other stovetop-safe pans. Check the version you’re ordering, especially when several sizes or finishes share a listing.
How to check an induction roasting pan you already own
With a cool, clean pan, try a magnet underneath at the center and at several points toward the sides. Firm attraction tells you where there is magnetic material. If the magnet grabs only in the middle, measure that area instead of the entire footprint. If your prospective induction roasting pan has no explicit stovetop instructions, a magnet result alone cannot establish that the manufacturer approves burner use.
Turn the pan right-side up and set it on a clean, level surface. A pan that visibly rocks or has a raised base deserves a closer look. GE Appliances’ guidance on induction cookware size and shape calls for contact with the glass and says to measure the flat, magnetic part of the bottom. For an induction roasting pan, both conditions matter more than a magnet sticking to a rolled rim or handle. If your cooktop still flashes after the fit check, see our induction pan detection troubleshooting guide.
2. Measure the base against your cooktop zones
Take three measurements for an induction roasting pan: the full width across the handles, the flat base from end to end, and the flat base from front to back. The first tells you whether the roaster fits the oven and clears the cooktop controls. The last two tell you how the base sits on the marked heating area. Measure the magnetic portion separately if the magnet test shows it covers only part of that base.
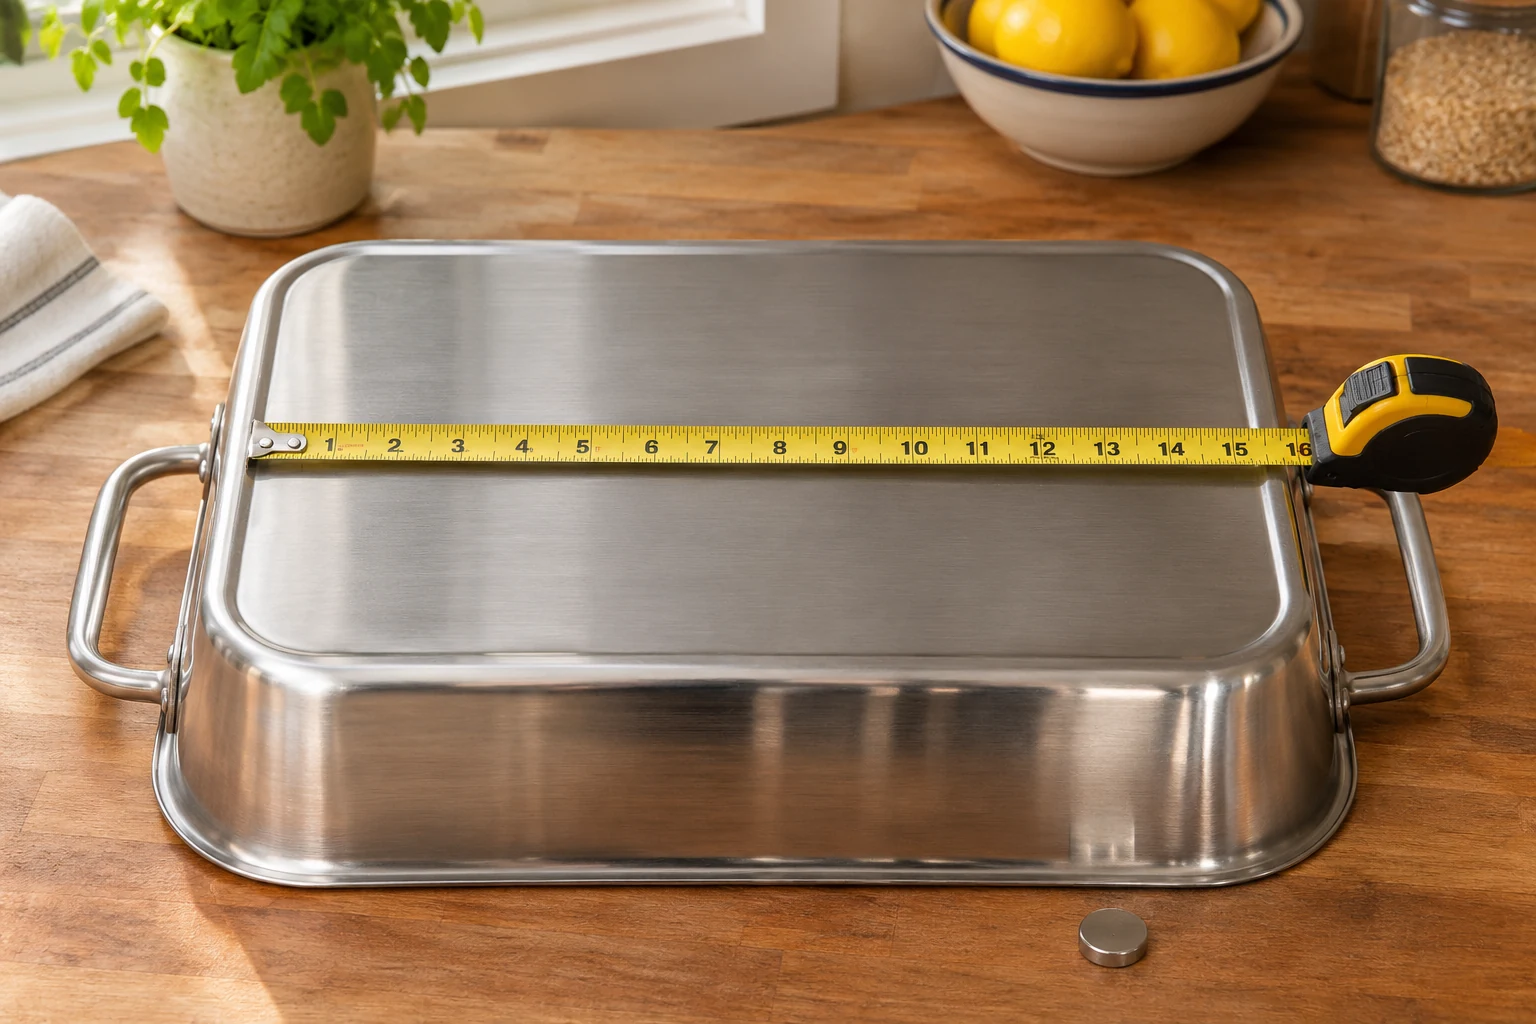
Say your rectangular base measures 13 by 9 inches and your largest single zone is 8 inches across. A centered pan can still leave large parts of both ends beyond the heated area. The center may bubble while the corners stay quiet. That can be workable for loosening a little fond, the browned residue stuck to the bottom. For a flour-thickened gravy, the same layout can make it harder to manage a shallow layer that thickens quickly in the center.
A bridge zone can help when the manual permits an induction roasting pan across those specific zones. Look up the drawings for your model and check the permitted cookware placement, size, and control settings. Two nearby circles do not establish that the cooktop will run them together or heat the gap between them. If the pan covers touch controls or sits against metal trim, choose a smaller vessel for the stovetop portion.
For example, Bosch’s manual for its NITP060 induction models distinguishes the shape and magnetic area of the base from the size of the cooking zone. It also rules out adapter plates on those models. Check your own manual before relying on an adapter disc or borrowing a bridge arrangement from someone else’s range.
3. Make sure the handles and rack fit your oven
Measure the usable width between the rack supports and the depth with the oven door closed. Include the pan’s handles and any rack handles that sit above the rim. On a convection oven, look for a fan cover protruding at the back. The dimensions on a product page are a starting point. If a listing gives a nominal size and outside dimensions, use the outside dimensions for clearance.
A useful example is the Cuisinart MultiClad Pro 16-inch roaster with rack. Cuisinart lists model MCPS117-16BRP1 as suitable for induction and gives outside dimensions of 19.3 by 12.1 by 5.2 inches. That difference between the name and the listed length matters if your oven has about 19 inches of usable width. Its stainless rack makes it a sensible induction roasting pan to consider if you want an uncoated rack and usually roast chicken or a moderate-size turkey.
Cuisinart lists capacity at up to 18 pounds and points out that two turkeys of the same weight can have different proportions. Treat the weight rating as a shopping guide. Check how the bird sits on the rack and whether you have space to remove the loaded induction roasting pan with thick oven mitts. A rack that uses nearly all the available width can be awkward to lift once juices and vegetables are in the bottom.
For more on clearance and rack shape, see our roasting pan size guide. Use a thermometer to check the bird itself. FoodSafety.gov’s turkey guidance specifies 165°F in the thickest part of the breast and the innermost parts of the thigh and wing. The cooktop check helps you plan the gravy. The temperature check tells you when the bird is ready.
4. Compare the cooking surface before paying for a larger pan
A flat interior helps you sweep a whisk through the drippings. With a deep perimeter channel, the first few tablespoons of liquid may run around the cooler edges while the hotter center looks dry. A flat exterior helps an induction roasting pan sit steadily on the glass. Look at photos of both surfaces and ask for base dimensions if the seller gives you only the rim width.
The Viking 3-Ply Stainless Steel 16-by-13-inch roaster is a practical option if you regularly serve a large bird and have room to store the extra pan. Viking describes an induction-compatible flat base and a V-shaped nonstick rack, with room for birds up to 20 pounds depending on shape. Check the rack’s care instructions separately from the pan’s and compare the wider footprint against your oven and cooking zone before buying.
For holiday meals, upright handles can make an induction roasting pan easier to lift with mitts. They also add height and can make the rack above harder to use. Think about where the hot induction roasting pan will land while you lift the bird out. A clear, heat-safe landing spot next to the oven is more practical than carrying a heavy roaster past a crowded cooktop. For help judging the construction, see our stainless steel cookware guide.
If you mostly roast thighs, turkey breast, or a chicken for four, check whether a stainless skillet you already own is oven-safe at the recipe temperature. A smaller piece can leave room for a second dish in the oven and be easier to center on one zone. Our cookware starter guide explains where an oven-safe skillet fits in a small cookware collection.
5. Rehearse the oven-to-cooktop move before dinner
When the pan and cooktop manuals allow the combination, put the cool induction roasting pan on the permitted zone with enough water to cover the base in a shallow layer. Try moderate heat and watch which part begins simmering. This gives you a practical picture of how the two pieces work together. An aggressive boil can hide the early difference between the center and the ends, so give the water time to warm.
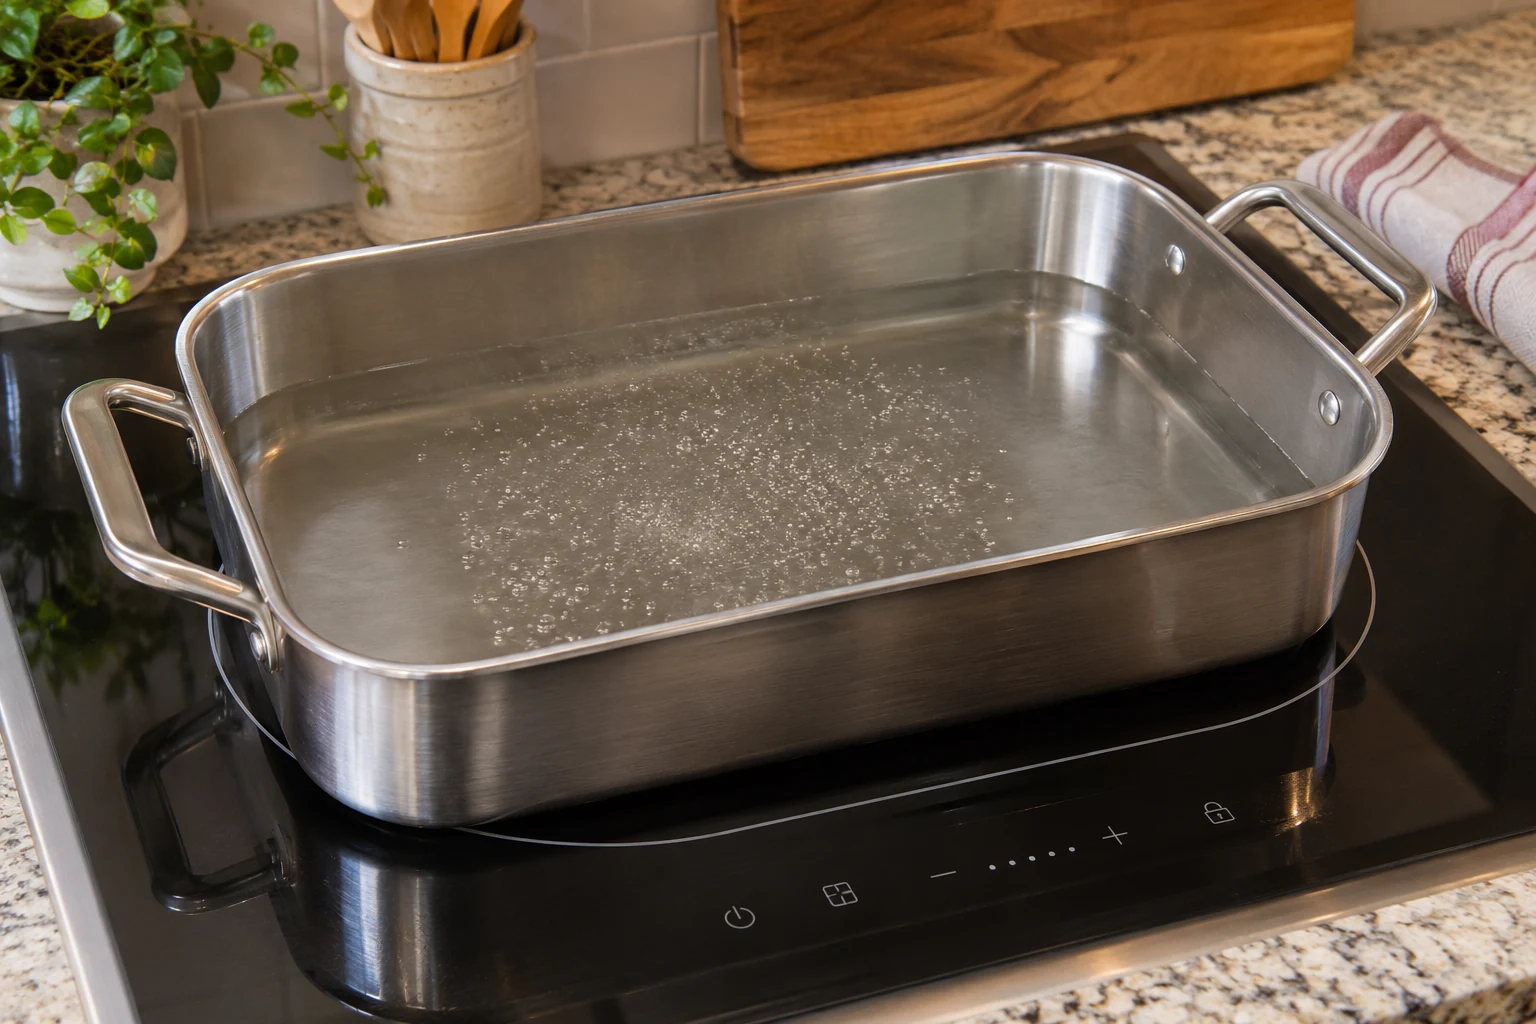
If the test works but most of the bubbling is in the center, plan to deglaze gently and move the liquid to a smaller pan to finish the gravy. If the controls keep flashing, use the saucepan method from the start. You can make this decision days ahead, with a clean pan and a cool kitchen. For more on managing uneven heating and temperature shocks, see our cookware warping guide.
On serving day, lift out the rack and set it on a rimmed tray so it can drain while the roast rests. If you can comfortably lift and control the induction roasting pan with both hands, pour off the drippings into a heat-safe vessel. If the pan is too heavy or awkward, use a ladle. Look under the rack for deep brown residue. Leave any scorched, black patches behind so they do not make the gravy bitter.
If your burner inventory is tight, map out what will be on the cooktop when the roast comes out. A wide pan may block the zone where you planned to keep the potatoes warm, even if the roaster itself heats properly. Reserve an accessible zone for a small saucepan and turn its handle inward so someone can stir the gravy while you carve.
6. Make gravy without an induction roasting pan
Set a metal roaster that lacks induction compatibility on a stable, heat-safe surface. While it is still warm, add a little warm unsalted stock and gently loosen the browned bits with a wooden spoon, if the pan’s material and care instructions allow it. Work the stock around the sides before you pour or ladle it out. For glass or ceramic ovenware, follow its manufacturer’s temperature-change instructions. If adding liquid to the hot dish is not permitted, collect what you can safely spoon out and add it to the saucepan.
For larger batches, the OXO Good Grips Good Gravy 4-cup fat separator lets the juices drain from below the fat layer. It helps when you’re collecting drippings from a wide pan and want to measure the liquid before adding it. A heat-safe measuring jug and spoon can do the same job for a small roast.
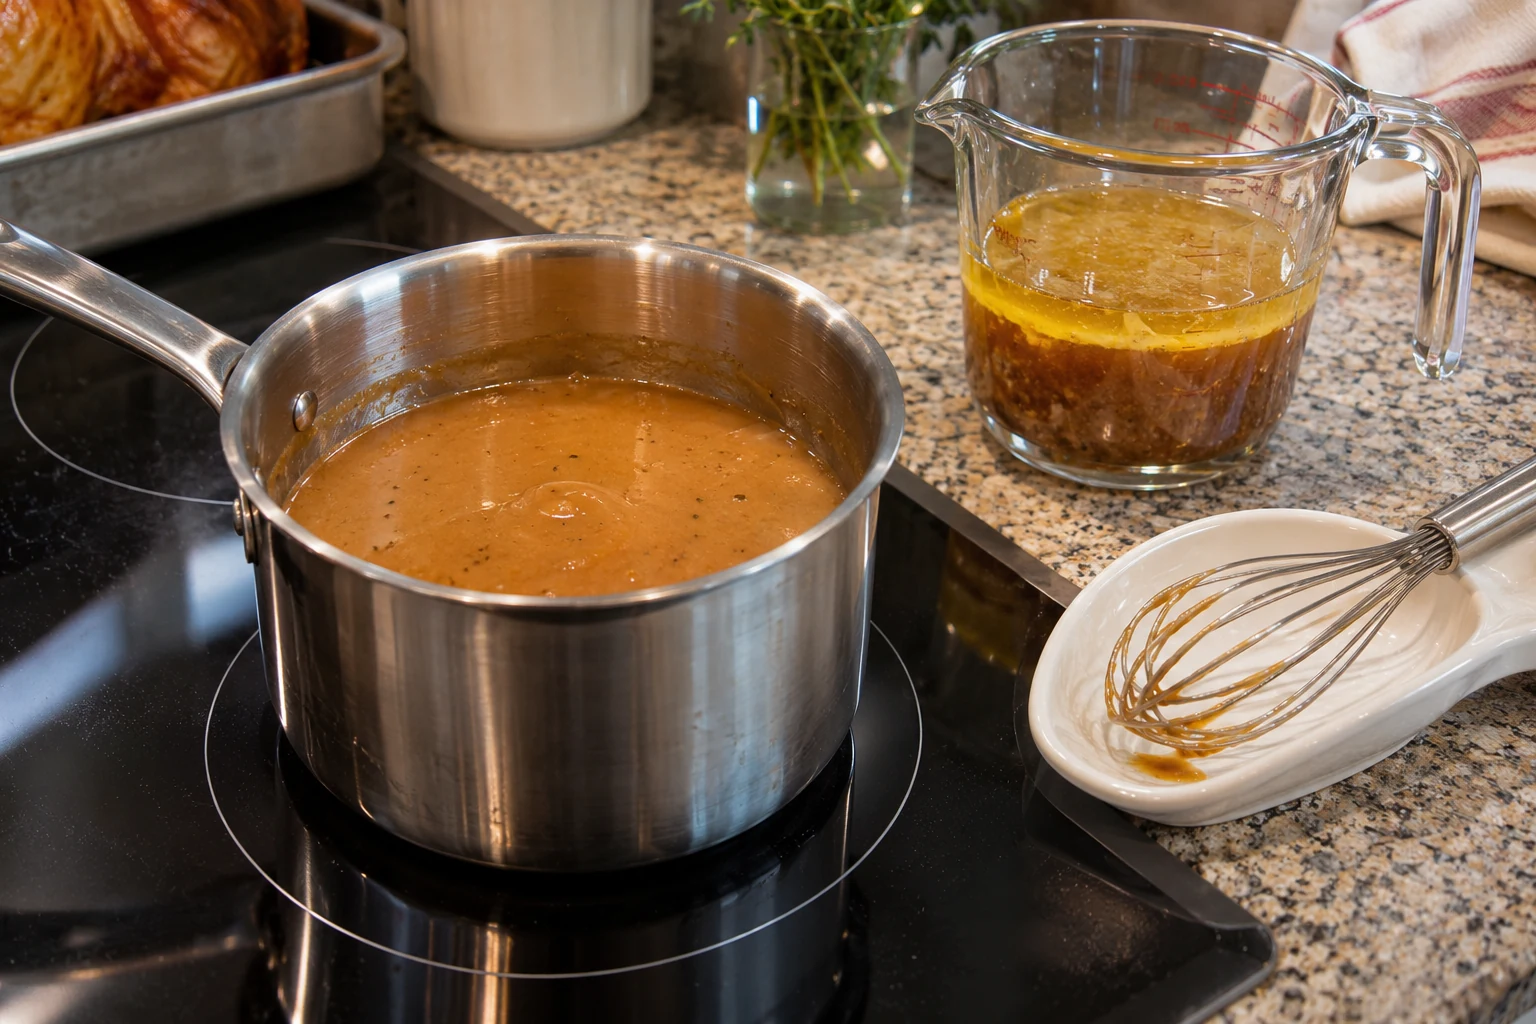
For about two cups of medium-bodied gravy, start with two tablespoons of reserved turkey fat or unsalted butter and two tablespoons of flour. Whisk them together over medium-low heat until the mixture smells lightly toasted. Gradually whisk in about two cups of warm liquid, including the strained drippings and enough low-sodium stock to make up the difference. Bring it to a gentle simmer and judge the thickness from the back of a spoon. If it coats too heavily, add stock a tablespoon at a time. Taste for salt after the gravy reduces, especially if the turkey was brined.
Even with an induction roasting pan, a saucepan can be easier for a small batch. If the roast yields only a little liquid, let the fond supply the roasted flavor and let stock supply the volume. If the fond is mostly burned, strain the liquid, taste it on its own, and use plain stock if the bitterness carries through. This is one of the quickest decisions you can make before committing all the drippings to the roux.
7. Buy for the meal you cook most often
If you’re considering your first induction roasting pan, start with how often you roast. If you roast once or twice a year and already own a sturdy oven pan, start with the saucepan method. Your shopping list may be as short as a carton of unsalted stock. Our roasting pan alternatives guide covers other oven-safe pieces you may already own. If you roast often and want to deglaze in the same vessel, buy the induction roasting pan whose base fits an approved zone and whose handles clear your oven comfortably.
Read the temperature limits for both the pan and the rack before planning a high-heat finish. If you use the broiler to brown vegetables or crisp skin, look for explicit broiler approval for each component that stays under the element. And when dinner is over, check where the induction roasting pan will dry and live. A rack that nests inside the pan saves room. A bulky roaster balanced atop several skillets is harder to pull out for an ordinary Sunday dinner.
Frequently asked questions
Can a stainless steel roasting pan go on an induction cooktop?
Yes, if its manufacturer approves that exact model for induction and its flat magnetic base fits a supported zone. Check the model number, test the cool underside with a magnet, then follow the placement guidance for your cooktop. Compatibility can vary even within the same product line.
Can a rectangular induction roasting pan go over two burners?
Use two zones together only when your cooktop’s instructions permit that arrangement. If there is a bridge or flex setting, check the placement diagram and supported cookware dimensions. Otherwise, use a suitable single zone or make gravy in a saucepan.
Why does my roasting pan heat in the middle but stay cool at the ends?
A single circular zone heats the area above its coil most directly. The rest of the pan warms as heat travels through the metal. An induction roasting pan with a wide overhang can therefore simmer more strongly at the center, especially with a shallow amount of liquid.
Can I put a disposable aluminum roasting pan on induction?
A plain aluminum foil tray generally has no magnetic base and cannot heat directly on induction. Handle it according to the tray’s directions. For gravy, transfer the drippings to a stable, compatible saucepan.
How do I get the browned bits out without heating the roaster on the stove?
After you move the meat and rack, add a little warm stock off the cooktop if the pan’s material and instructions allow it. Loosen the browned residue with a pan-safe utensil and transfer the liquid to a saucepan. If the pan restricts adding liquid while hot, follow its instructions and collect the drippings separately.
Leave a Reply