Removing Sticky Residue from Cookware Made Easy
Have you ever pulled a “clean” pot from the dishwasher to find a tacky, stubborn film still on it?
This annoying problem plagues home cooks everywhere. It doesn’t matter if your kitchen tools are budget-friendly or high-end. That gummy adhesive left behind from labels or cooking can feel impossible to tackle.
I’ve been there, scrubbing away in frustration. But I’ve learned the cleaning process doesn’t have to be a battle. With the right understanding and a few proven methods, you can restore your items to a like-new state.
This guide will walk you through why this happens. You’ll get step-by-step instructions for effective techniques. We’ll also cover how to prevent the issue from coming back. For instance, finding a proven product that actually works can make all the difference.
Table of Contents
Key Takeaways
- This frustrating film is a common kitchen challenge for everyone.
- The quality or cost of your pots and pans doesn’t prevent this issue.
- Understanding the science behind the adhesion is the first step to solving it.
- Practical, tested methods exist that are simpler than you might think.
- Preventing future buildup is just as important as cleaning it up.
- Having the right tools and products on hand streamlines the entire process.
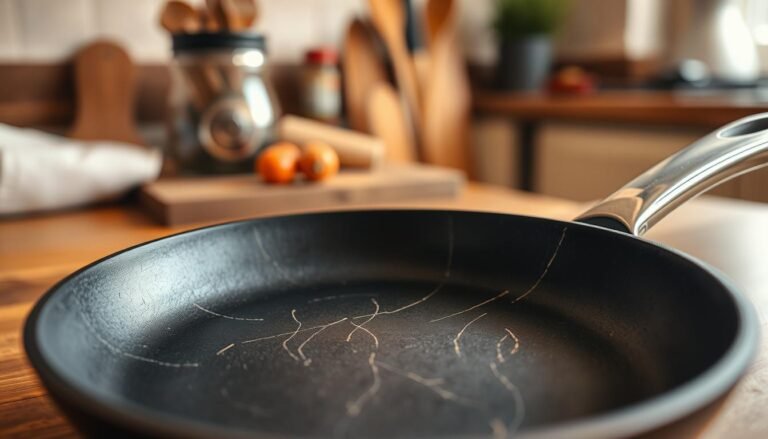
Why Your Cookware Develops Sticky Residue
If you’ve ever wondered why a seemingly clean lid feels tacky, science has the answer.
That film isn’t just dirt. It’s a chemical byproduct of your kitchen routine.
The Science Behind Stubborn Films
Lauren DaSilva, a senior product manager at All-Clad, explains the core issue. Oils and fats break down at high heat.
They then polymerize into a tacky film that bonds to surfaces.
“Oils and fats can break down at high heat and polymerize into a tacky film, while steam carries tiny particles of grease upward, settling on cooler surfaces like lids,” she explains.
No material is immune. This happens on glass, stainless steel, and even carbon steel pans.
How Oils, Fats, and Heat Contribute
Steam acts like a transport system. It lifts microscopic grease particles during cooking.
They then land on cooler areas, like lids and handles. This creates a noticeable film.
Starchy food splatters and soap that isn’t fully rinsed add to the problem. Over time, these layers harden.
Understanding this process is your first step toward a solution. Proper cleaning habits are essential.
| Factor | How It Contributes | Common Location |
|---|---|---|
| Polymerized Oils | Forms a bonded, tacky layer | Bottom of pots & pans |
| Airborne Grease | Steam carries particles upward | Lids & handles |
| Starchy Foods | Leaves glue-like particles | Cooking surfaces |
| Soap Residue | Dries into a thin film | Entire item |
Cookware Sticky Residue Removal
Recipe developer Marissa Stevens points a finger at a common kitchen shortcut: cooking spray. She notes its additives burn fast. They essentially glue themselves to the pan’s surface.
If possible, it’s best to avoid using it. This insight is key to tackling the problem.
The Role of Polymerized Oils in Stickiness
That gummy film is often polymerized oil. Heat transforms liquid fats into a hardened, sticky layer. It bonds tightly, making standard washing ineffective.

Understanding this chemistry is crucial. Since the film is oil-based, oil-based solutions can break it down. Vegetable oil acts as a solvent.
This principle guides effective removal methods. For a comprehensive guide on techniques, explore this resource for cleaning sticky cookware.
| Source of Film | Primary Effect | Suggested Approach |
|---|---|---|
| Cooking Spray Additives | Burn and bond quickly, creating a glue-like layer. | Avoid use; opt for liquid oil. |
| Polymerized Oil | Forms a hardened, tacky coating from high heat. | Use oil or commercial degreasers to dissolve. |
| Starch & Soap Residue | Leaves a thin, dried film that feels slick. | Ensure thorough rinsing with hot water. |
| General Prevention | Prevents buildup before it starts. | Clean immediately after use while still warm. |
Knowing what causes the stickiness is half the battle. Next, we’ll move to practical steps for getting your items clean.
Step-by-Step Guide to Removing Sticky Residue
I’ll guide you through a simple paste method and a classic kitchen hack for steel surfaces. Both are effective and use common household items.

Follow these steps closely for the best results. Always test a small area first if you’re unsure about a material’s compatibility.
Using Bar Keeper’s Friend Paste Method
This is my go-to for a reliable clean. Start by mixing the powder with a small amount of water to create a thick paste.
Apply it directly to the tacky spots. Let it work its magic for about 3 to 5 minutes.
Then, take a soft sponge. Gently scrub in small circles to lift the film. Rinse everything thoroughly with warm water. Repeat if needed.
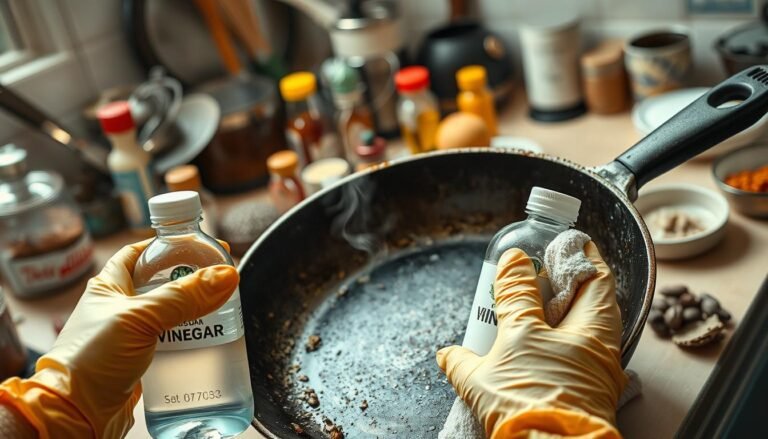
Baking Soda and Vinegar Technique for Stainless Steel
For tough spots on handles and rivets, make a powerful paste. Combine baking soda, salt, and hot water.
Apply it and wait another 3 to 5 minutes. A soft toothbrush is perfect for agitating these tight areas.
For the main surface of a stainless steel pan, try a different method. Add equal parts water and vinegar to the pan and bring it to a gentle boil.
Pour out the liquid and let the steel cool slightly. Then, sprinkle baking soda on the warm surface and scrub with a non-abrasive sponge. Remember, this vinegar technique is only for stainless steel surfaces, not other materials.
| Method | Best For | Key Steps | Contact Time |
|---|---|---|---|
| Bar Keeper’s Friend Paste | General use on various materials | Mix powder with water, apply, wait, scrub gently, rinse. | 3-5 minutes |
| Baking Soda & Vinegar | Stainless steel only (hardware & surfaces) | Create paste for hardware; boil water-vinegar mix for pan interior, then apply soda. | 3-5 minutes per step |
Choosing the right technique depends on your item’s material. For instance, these methods differ from cleaning non-stick surfaces, which require gentler care.
Alternative Kitchen Techniques for Stubborn Adhesives
New pots and pans often come with annoying price tags that leave behind a gummy mess. This is a different challenge from cooked-on film. I have effective methods for tackling these labels.
These solutions work on glass, metal, and plastic surfaces. They complement the cleaning techniques we’ve already covered.

Vegetable Oil and Heat Application
First, warm the item on a low burner for a few minutes. The gentle heat softens the adhesive. This prepares it for speedier removal.
Apply a generous amount of vegetable oil directly onto the sticker. Let it sit for at least 15 minutes. The oil penetrates and breaks down the glue.
Most adhesives are soluble in oil. This makes common kitchen products like vegetable oil very effective.
Commercial Adhesive Removers and Rubbing Alcohol
Specialty products like Goo Gone are formulated for this job. Always check the manufacturer’s instructions first. They contain ingredients designed to dissolve stubborn glue.
For a DIY option, use rubbing alcohol. Work away from any heat source. Pour a small amount onto a clean cloth or paper towel.
Dab the alcohol onto the label, saturating it completely. Allow several minutes for the solvent to work. Then, you can wipe the sticky residue away easily.
Tailoring Cleaning Methods for Different Cookware Materials
The material of your kitchen items dictates the safest and most effective way to clean them. No type is immune to film buildup, as Lauren DaSilva notes. Even high-quality glass and stainless steel experience it.
I explain that different materials require tailored approaches to avoid damage while effectively cleaning surfaces.
Best Practices for Stainless Steel and Glass
Stainless steel and glass pans can handle more aggressive methods. They tolerate abrasive pastes and high heat well.
For instance, the vinegar boiling method and scrubbing with baking soda work perfectly on these surfaces. There’s no risk of scratching or discoloration when done correctly.
Proper technique still matters for preserving your steel and glass pans.
Safe Approaches for Plastic and Non-Abrasive Surfaces
Plastic requires gentler approaches to prevent damage. Avoid applying excessive heat, as this can cause melting or warping.
Even when trying to soften adhesive, too much heat deforms plastic. Use soft cloths and non-abrasive techniques for these items.
Always spot-test any abrasive method on softer materials like plastic or metal before full application.
| Material | Tolerates Aggressive Methods? | Safe Techniques | Important Notes |
|---|---|---|---|
| Stainless Steel | Yes | Abrasive pastes, vinegar boil, baking soda scrub | No scratching risk; ensure thorough rinsing |
| Glass | Yes | Similar to steel; can use high heat | Generally forgiving but handle with care |
| Plastic | No | Soft cloths, mild soap, spot-testing | Avoid heat; prevent warping and scuffs |
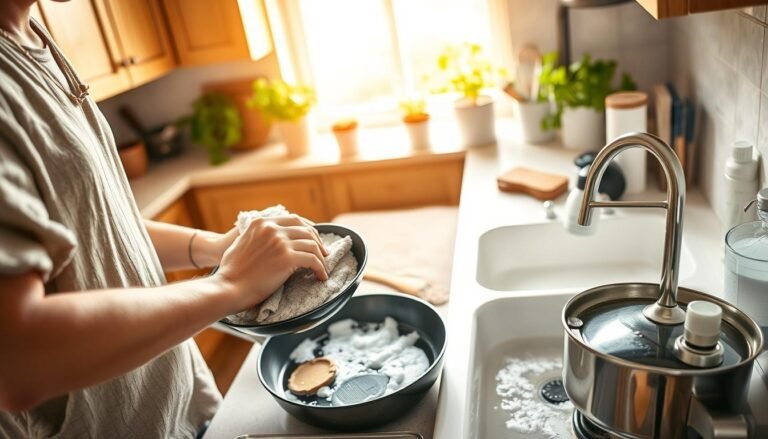
Preventing Future Residue Buildup with Smart Cleaning Habits
Smart daily habits can save you from weekend scrubbing sessions on your pots and pans. I believe prevention is the best way to avoid spending time on stubborn film. Building good routines in your kitchen makes deep cleaning rare.
Selecting the Right Dish Soap and Products
Choosing your soap matters a lot. Mild formulas often fail to cut through baked-on grease. This leads to residue buildup over time.
I recommend a soap made to break down oils and food particles. It stops them from hardening into a film. This simple switch makes a huge difference.
Avoiding Common Cleaning Pitfalls
Don’t let greasy items soak in dirty sink water. The oil just spreads instead of breaking down. Clean them right after use, before film hardens.
I also advise skipping cooking spray when you can. It’s a top culprit for creating a bonded, sticky layer. Proper rinsing removes all particles that cause trouble.
| Prevention Habit | How It Helps | Extra Note |
|---|---|---|
| Use Grease-Cutting Soap | Effectively breaks down oils before they polymerize. | Prevents that slick film from forming. |
| Clean Immediately After Use | Removes food and grease while they’re still soft. | This is the single most effective step. |
| Avoid Aerosol Cooking Sprays | Eliminates additives that burn and bond quickly. | Opt for a light oil mist instead. |
| Rinse Thoroughly with Hot Water | Washes away all soap and loosened residue. | Prevents any leftover film from drying. |
These habits work for all materials, from stainless steel to cast iron cookware. Consistency is your best tool for a spotless kitchen.
Conclusion
You now have the knowledge to conquer that annoying film for good. This common problem has multiple effective solutions. We’ve covered methods like the Bar Keeper’s Friend paste and the baking soda and vinegar technique for stainless steel.
The process often requires just a few minutes of contact time. Understanding the science behind oil polymerization helps you choose the right way. Different materials, from metal to plastic, need tailored approaches.
Prevention is key. Avoid aerosol cooking spray and clean items promptly with hot water and proper soap. For more on maintaining specific types of pans, explore our guide on non-stick surfaces.
With these strategies, your kitchen tools will stay in top condition, free from persistent buildup.